Chapter 7 How to
7.1 Contribute to this handbook
The easiest way to edit the team handbook is via the GitHub user interface.
Navigate to the webpage of the public repository.
Click on the .Rmd file you want to edit. Keep in mind that each .Rmd file corresponds to one chapter. The welcome page text is found in
index.Rmd, while all other files are named after the corresponding chapter e.g.01-group-culture.Rmdor02-team.Rmd.Click on ‘Edit this file’.
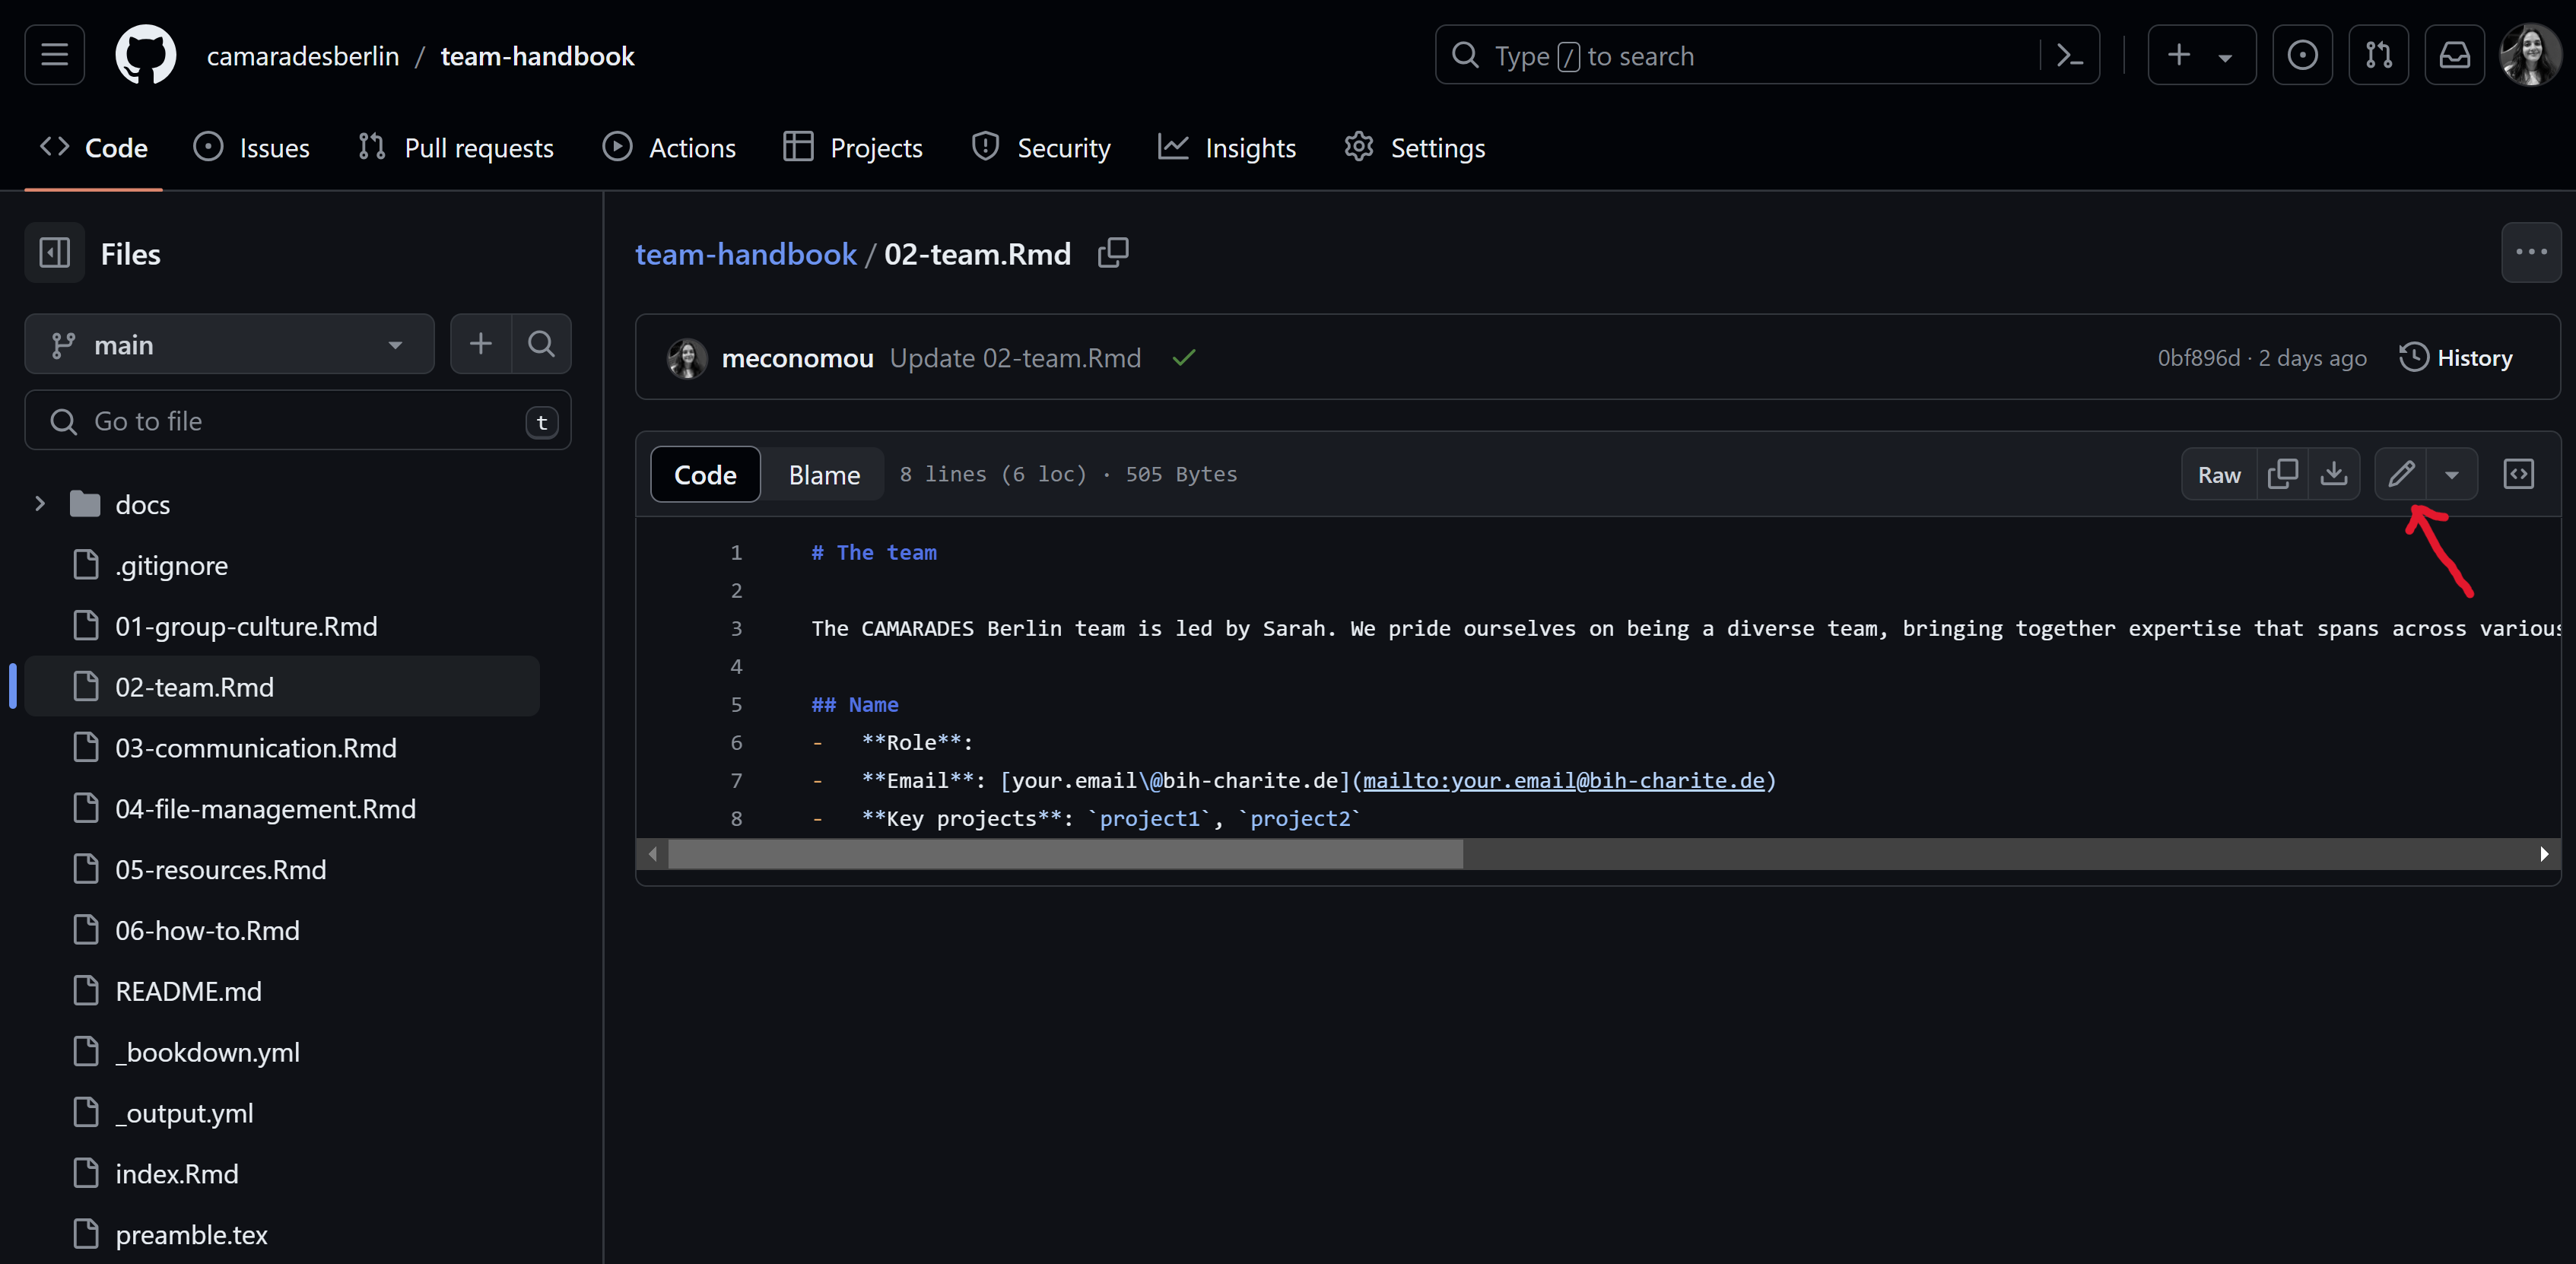
- Add/edit content of file. The easiest way to do this is to write plain text and use simple Markdown syntax for formatting (e.g., to add (sub)headings, format italics or bold, add hyperlinks or pictures, bullet points etc). If unsure, you could have a look at how other files of the handbook are formatted or consult this or this Markdown cheat sheet. Please don’t hesitate to ask for support from the team if there any issues/questions. Once you’re happy with your changes click the ‘Commit changes’ button.
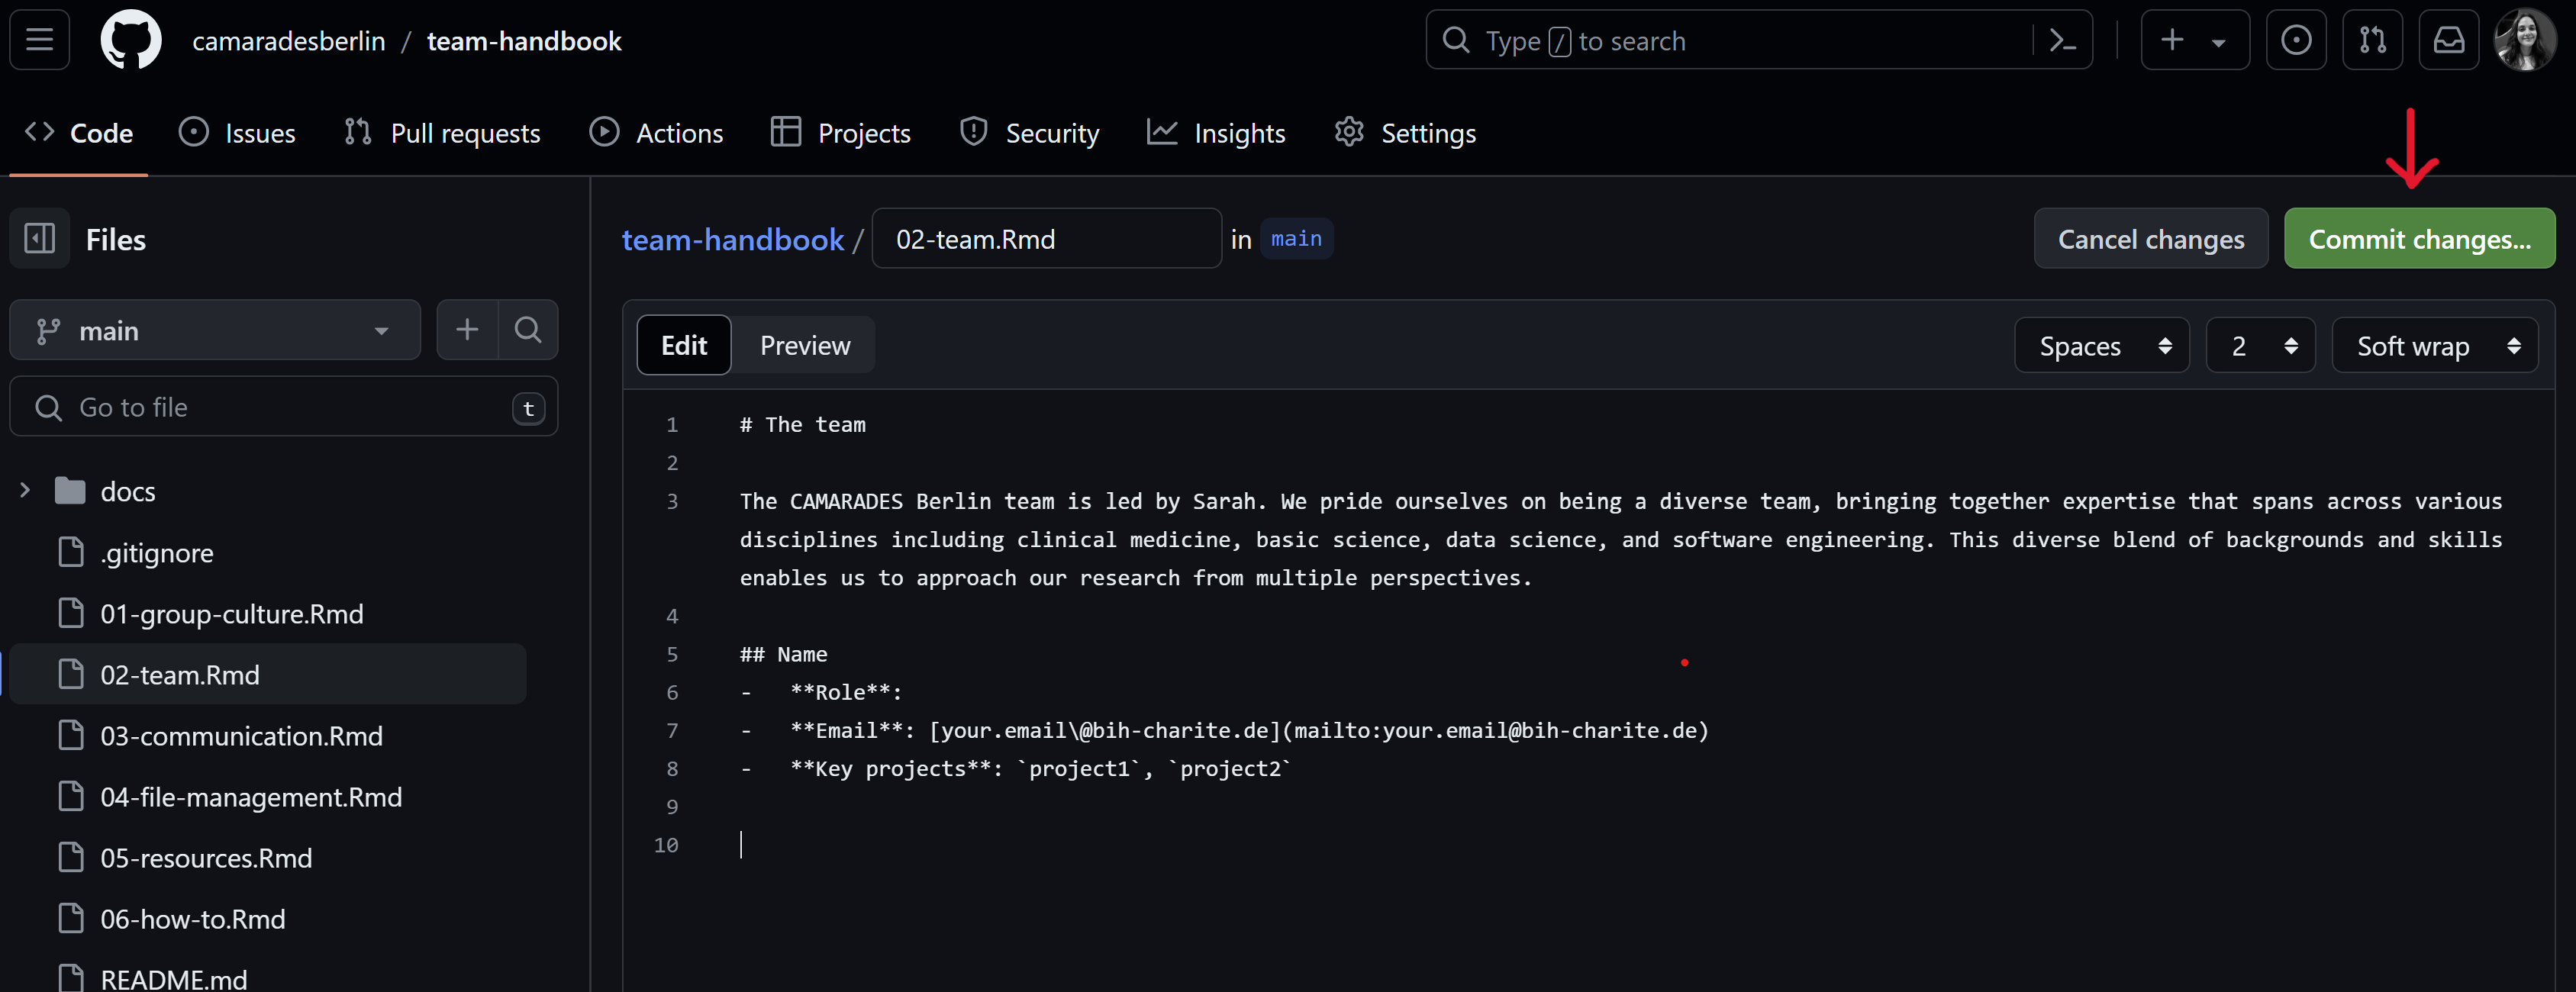
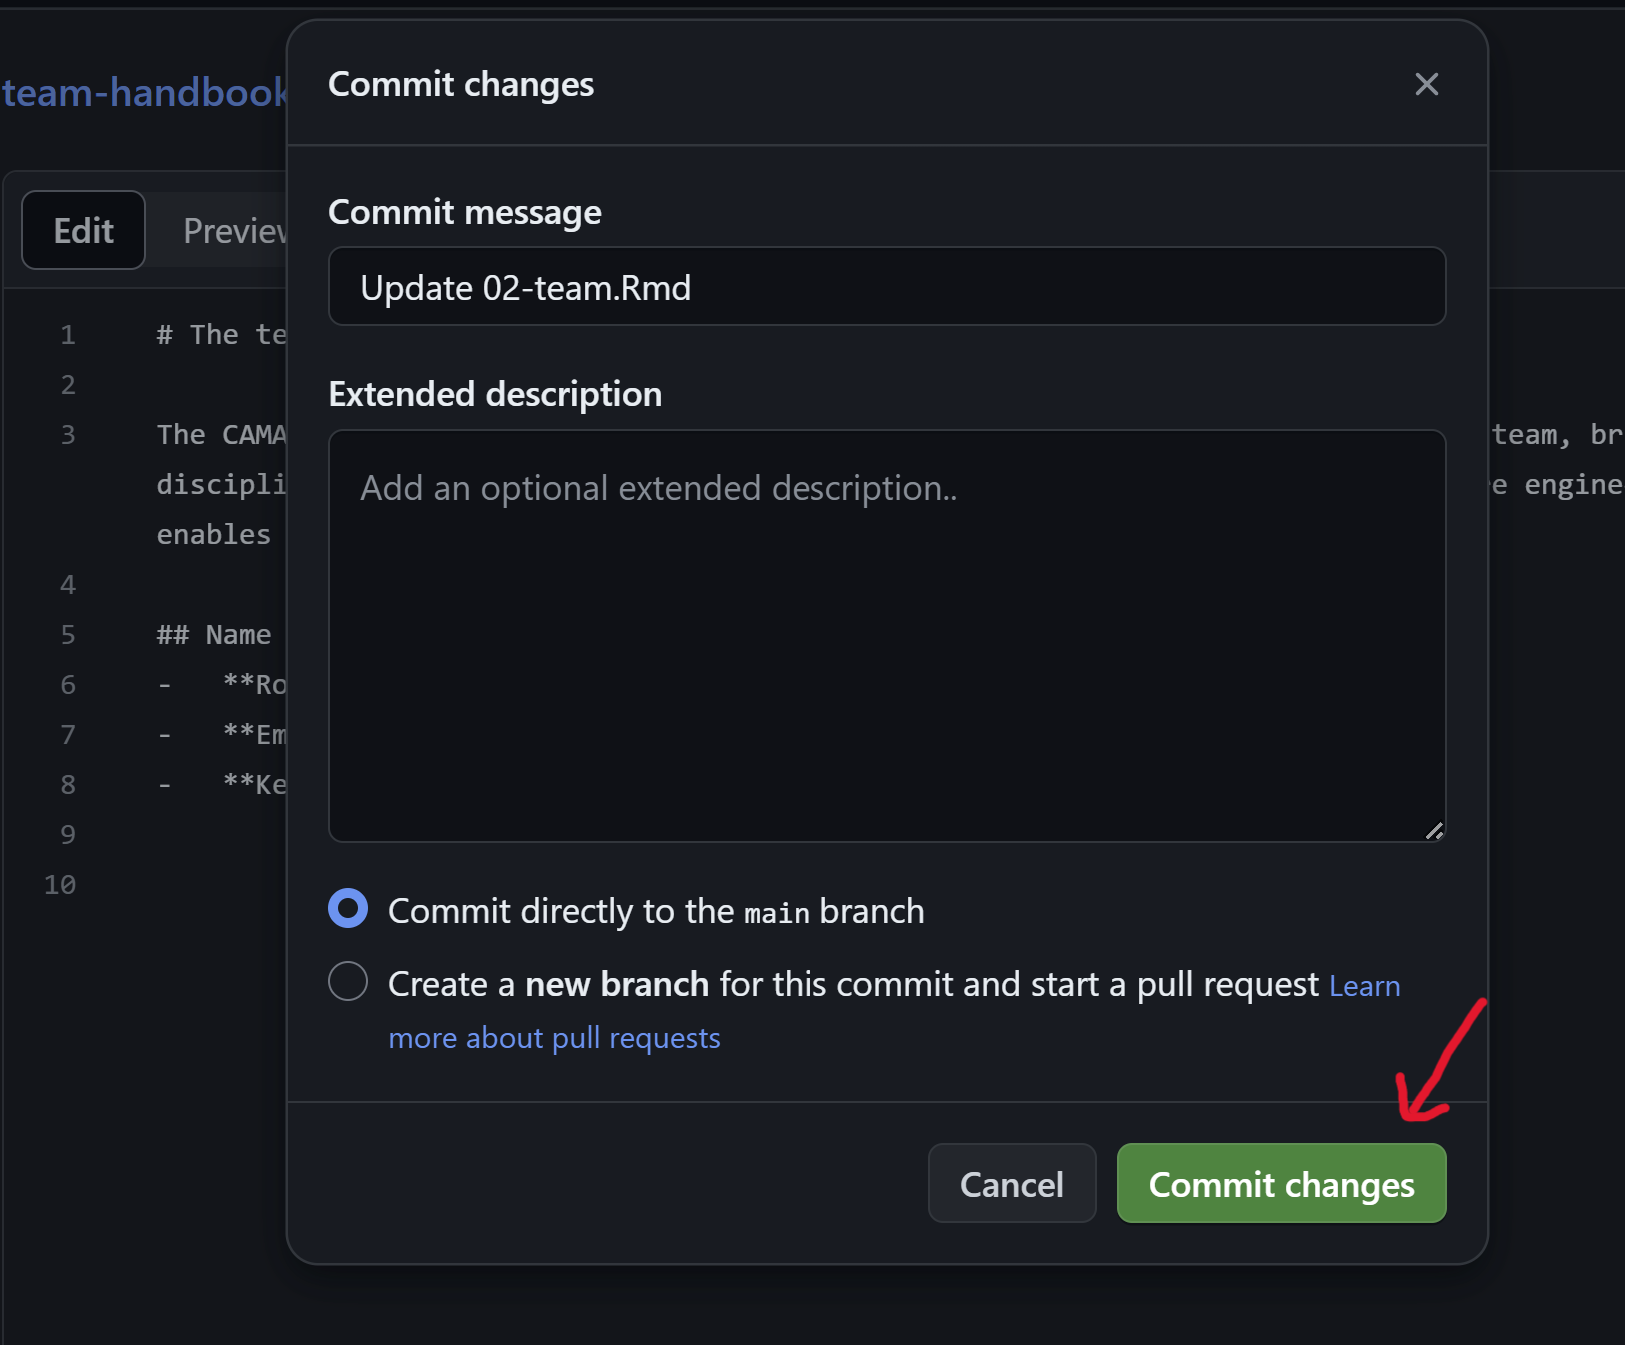
- You will be prompted to add a commit message. This should be a short and ideally informative message about the changes you’ve made to the file. A more detailed description can optionally be provided in the box below. To finalize your edits click on the ‘Commit changes’ button.
7.2 Use the R functions available on CAMARADES Berlin GitHub
7.2.1 Getting started
- Open Rstudio and create a new project using the following steps:
File > New project > Version control > Git
For repository URL add the link to the GitHub repository: (https://github.com/camaradesberlin/tools). Choose where you want this folder to be created and click on ‘Create project’.
- Install the
pacmanpackage if you haven’t already. This will take care of loading the right libraries for the functions. You can do this by typing the following in the R console:
install.packages("pacman")
- Load the function(s) you want to run. Currently, the functions are stored in separate scripts. Have a look at the repository webpage for more information on what each function does and input/output details.
For example, if you want to run the function to retrieve retraction information, type the following in the console:
source("get_retractions.R")
get_retractions("path/to/citations.csv")
7.2.2 Get the latest version of the functions in case of updates
Open Rstudio and load the project: File > Open Project
In the Environment pane, click on the Git tab and then on the ‘Pull’ blue arrow pointing down. This will update your local repository with any changes made on the remote repository (GitHub).

- Load the function(s) as described in the section above.
7.3 Use Git/GitHub in Rstudio for version control
7.3.1 Getting started
Create a personal GitHub account at https://github.com/join if you don’t already have one. Ask one of the team members to add you to the admin team of our CAMARADES Berlin GitHub
7.3.1.1 Git configuration
The next step is to set up your user information so you can start using git. You can use the package usethis to do this in R. Note that the e-mail address you provide should be one that is associated with your GitHub account.
# install.packages("usethis")
library(usethis)
use_git_config(user.name = "yourname", user.email = "youremail@example.org")
7.3.1.2 Personal access tokens (PATs)
Certain actions, such as pushing changes to GitHub or cloning a repository need user authentication. Your GitHub user password is not an accepted way to do this anymore, which means you have to generate another type of authentication credential. This is known as the personal access token (PAT).
If you don’t already have a PAT, you can generate one by calling usethis::create_github_token() in R. This will lead you to github.com on the PAT generation form. Make sure you select all the appropriate scopes for this particular token (keep defaults if unsure), before clicking on Generate Token. You won’t be able to see this token again, so copy it to clipboard and don’t close the browser window until you have stored it locally!
One approach is to store your PAT in .Renviron so that it is made available to GitHub and you won’t have to re-enter your credentials every time you need authentication. Call usethis::edit_r_environ() and then add a line like this substituting your PAT:
GITHUB_PAT=ghp_xxxxxxxxxxxxxxxxxxxxxxxxxxxxxxxxxxxx.
Alternatively, the package gitcreds can be used to store and implicitly retrieve your PATs (recommended). gitcreds::gitcreds_set() will prompt you to provide your newly generated PAT.
7.3.2 GitHub/RStudio workflow
7.3.2.1 Clone the GitHub repository
Next, you will want to clone (i.e. create a local copy of) the target repository so you can work locally. In RStudio, go to File > New project > Version control > Git. Enter the details of the repository you want to clone e.g. the team handbook public repository and click on Create project.
If no credentials are stored, you might be prompted to provide your GitHub username and password when cloning the repository. The PAT should be used here, not your GitHub user account password. See section above on how to generate and store a PAT for future use.
7.3.2.2 Commit changes
While editing and files in your local repository, it’s not enough to just save these files locally. You will also reguarly want to commit these changes, which means that different versions will be stored in the git directory as you go along. This creates a history of your edits and can help you track progress or even revert back to an older script if needed. Once you’ve edited your local files and you are ready to commit these changes, click on Commit in the Git tab. In the pop-up window you will be able to select which files you want to include in this commit, along with a concise and informative message about what has changed. Once you are ready, click Commit. It’s generally helpful for yourself and collaborators you try to limit each commit to specific features/thematic tasks/fixes.
7.3.2.3 Pull/Push changes
Pulling and pushing are actions that allow your local branch (your own computer) and the corresponding branch in the remote repository (GitHub) to communicate. When you want to update your local repository with changes made by others, you pull the changes from the remote repository using git pull. To send (or push) the changes and commits made in your local repository to the remote one, you use the git push command. In RStudio, you can do these actions by using the corresponding Push and Pull buttons found in the Git tab.
Alternatively, the following command in the terminal will push commits made in your local branch to the corresponding remote one:
git push origin <branch-name>